Sunday, July 24, 2016

58. - The 5,300 Mile Drive To Build

The red line shows the path driven out to build the kayak in Oroville, Washington. On the way there I went via South Dakota on up to home. On the way back we travelled across the Canadian Rockies and the flat plains of Alberta, Saskatchewan, and Manitoba. Most of the trip in the U.S. Was at 80mph so the miles flew by. The fastest speed in Canada, on even flatter and straighter roads, was 66mph. That 14mph swing makes a LOT of difference, turning a 2-day drive out into 3 days of 14+ hour driving coming home. The Canadian Rockies were absolutely stunning. Especially Canmore Alberta. Total trip was over 5,300 miles.  I must also say that the drive home, with my wife along was fantastic. She supported this crazy idea from the get go and I cannot thank her enough for making this entire project a reality.

Wednesday, July 20, 2016

57. LAUNCH DAY!

This Wood Duck performed flawlessly and paddles like a dream. What a wonderful adventure building this with my niece.

Monday, July 18, 2016

56. Day 8 - FINISHED!

The final coat of epoxy is on, hatch hold downs in place, foot braces installed. DONE! Next pics will be of launch day on Wednesday or Thursday. Mission accomplished. Susannah says thank you for an awesome adventure.

Sunday, July 17, 2016

55. Day 7 - Deck Glass

With the hull completed (final epoxy coat went on at 0130 this morning!), it was time for the deck. After sanding and shaping, the Fiberglas went on. At the 4 hour cure time we cut out the cockpit and hatch. Next was the cockpit rim, the FINAL piece to be attached to the boat. Construction is complete. We started 1 week ago today and even took Thursday off! A couple fill epoxy coats and some sanding on the cockpit rim and it will be done! What a great adventure this has been.

54. Day 6 - Waiting Game

You don't see a lot of outward progress today. It's a day of filling epoxy coats and waiting for it to cure. Huge plus... This means our goal is really in sight!

Friday, July 15, 2016

53. Day 5 - Fiberglas Happened


Today was another day of great progress after taking the day off yesterday. Started off sealing the interior seams between the deck and hull and then applying fiberglass tape and epoxy to the seams. A couple hours were spent sanding the hull to prep the surface and give the final shape. A pretty good panic ensued when we thought we threw away all the Fiberglas. Took an hour to realize it was in the house, right where we left it. The hull received it's glass and epoxy. Turned out stunning! Finished the day prepping the hatch cover and the cockpit rim.

Wednesday, July 13, 2016

52. Day 4 - Wedding Day

Today the deck and hull became one. After attaching the foot braces and autographing our work, we stitched the deck to the hull and glued the seam. Some of the wood did not want to cooperate but in the end brute force wins out. Made even more progress this evening by gluing up the cockpit coaming. Tomorrow is a well deserved day off!

Tuesday, July 12, 2016

51. Day 3 - Gettin' Stitches Out

Another incredible day. Stitches came out and temporary forms removed. All seams received fiberglass tape and the inside of hull and deck were seal coated with epoxy then both were covered in Fiberglas. The humidity from a rain storm started softening the wood so we called it a day and cleaned up. Another push tomorrow with a planned day off in Thursday.

Monday, July 11, 2016

50. Day 2 - We Gotta Boat!!!

Day 2 started with a pile of boards and ends with a boat! These 2 kids are awesome. You explain something once and they are off and going. They did almost all of the stitching and epoxy work. We finished the day by joining the deck to the hull and cutting out the rear hatch.  Tomorrow we take the deck off, remove stitches, and begin building up the seams and laying up fiberglass. Being able to devote a full day to work, and this being my second kayak, makes the project progress very rapidly.

Sunday, July 10, 2016

49. Day 1 of Build Done

My 14yo niece and 12yo nephew at work joining panels. I coached them on the first two then they finished the next 4 on their own. This is gonna be awesome. The joints have been glued and reinforced with fiberglass. The bricks will hold the joint in place while the epoxy cures overnight.

Friday, July 8, 2016

48. Repackaged Duck

What is this at 4:30 in the morning? My 4 boxes of tools, gear, and supplies are at the front of the bed of my truck. I have completely repackaged the Wood Duck 10 so it will fit cross-wise in my 6 foot bed, thoroughly wrapped and sealed in 4mil plastic. Next stop... Somewhere in Wyoming... Hopefully. 28 hours of driving and then assembly begins. This Wood Duck is retracing the steps of the CLC Road Trip West!

Saturday, July 2, 2016

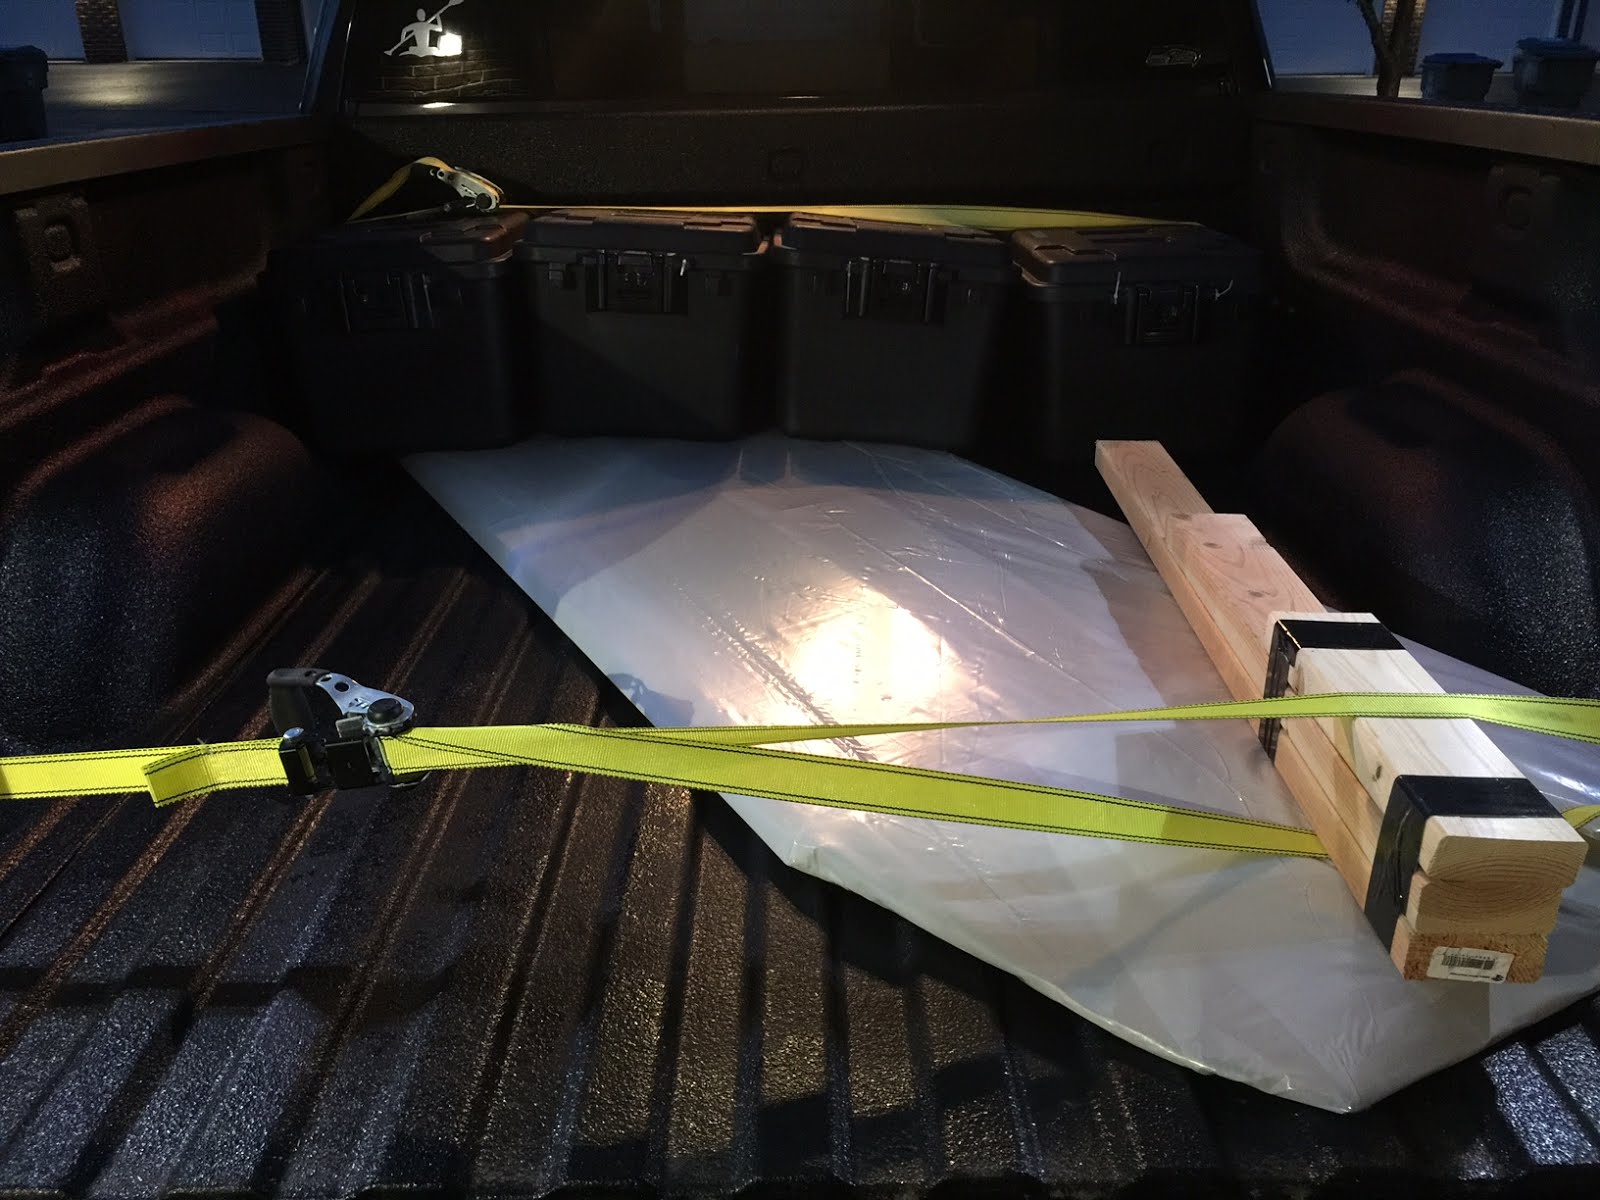
47. Wood Duck II - The Road Trip

Day 1 of new kayak build is complete. Got all of the panels beveled and ready to go. So you are asking what the road trip is? Well... I will be driving 1,930 miles to British Columbia to build this Wood Duck 10 with my 14 year old Niece Susannah and nephews Dustin and Tristan. I wanted to get the 5+ hours of hand planing done. Now I will repack the panels and load all my tools, sand paper, and epoxy to head west. The plan is to finish this baby in  2 weeks or less! Should be a great adventure. Thanks SO MUCH to my beautiful supportive wife Angela who made this possible. 143!

Sunday, May 8, 2016

46. Life is Good!

Really good! The kayak is 100% complete and the maiden voyage is in the books. Performed flawlessly and drew tons of questions, "Did you build this?", "Who sells these?", "That's too nice to be out in the water." This build has been an adventure, made all the more special by my loving and kind wife, who had a great hand in getting this done. Thanks Ang, I love you and thanks for making this possible.

Saturday, April 16, 2016

45. Varnish on Deck

Well the effort to create the plastic room to tame dust paid off tremendously! The first cot of varnish is dry on the deck with ZERO dust specks in it. Truly flawless finish.

Thursday, April 14, 2016

44. Room in a Room

The hull now has 4 coats of varnish and is finished and oh so beautiful. We had a slight problem with dust specks. My attempted solution is this room in a room. It will give dust 2 full days to settle before we put the first coat of varnish on the deck. Almost there!

Friday, April 1, 2016

43. Wet Sanding

What a great day to sand outside. This is the 1st outdoor work I have been able to do. It was raining, but hey, I was wet sanding. It went very well. Used 400 grit paper and sanded every inch of the kayak by hand. The 3rd coat of varnish will go on the hull tomorrow morning.

Sunday, March 27, 2016

42. Varnish Coat 2

Got 2nd coat of varnish on today. Very weird to scratch coat #1 with a green scotchbrite pad. But important to give the next coat a physical surface to grip. One spot on coat 1 had a small run, this was smoothed out and coat 2 does not show it at all. With 3 coats still to go I cannot believe the deep gloss this baby shows! Ang was instrumental in getting coat 2 this smooth. I applied varnish while she "tipped it out" by gently removing all bubbles and brushing all varnish in a single direction. During the apply apply apply tip out stage you really only have about 1 to 2 minutes work time to get it right. Any mistakes get sanded before next coat. As a team we rolled right through it.

Saturday, March 26, 2016

41. Varnish Coat 1

I was very nervous about his step. In post 40 below you can see the final coat of epoxy. The kayak is seaworthy in that state but the epoxy will yellow after long sun exposure. The real final step is the marine varnish. Well I sanded and sanded last weekend to get everything super smooth. This morning I applied the 1st varnish coat. It actually went very well. And the results! AMAZING! I had no idea the results would be this good. As seen in the picture it is completely dry. This is coat 1 of 5. I have to say WOW even at my own work.

Saturday, February 27, 2016
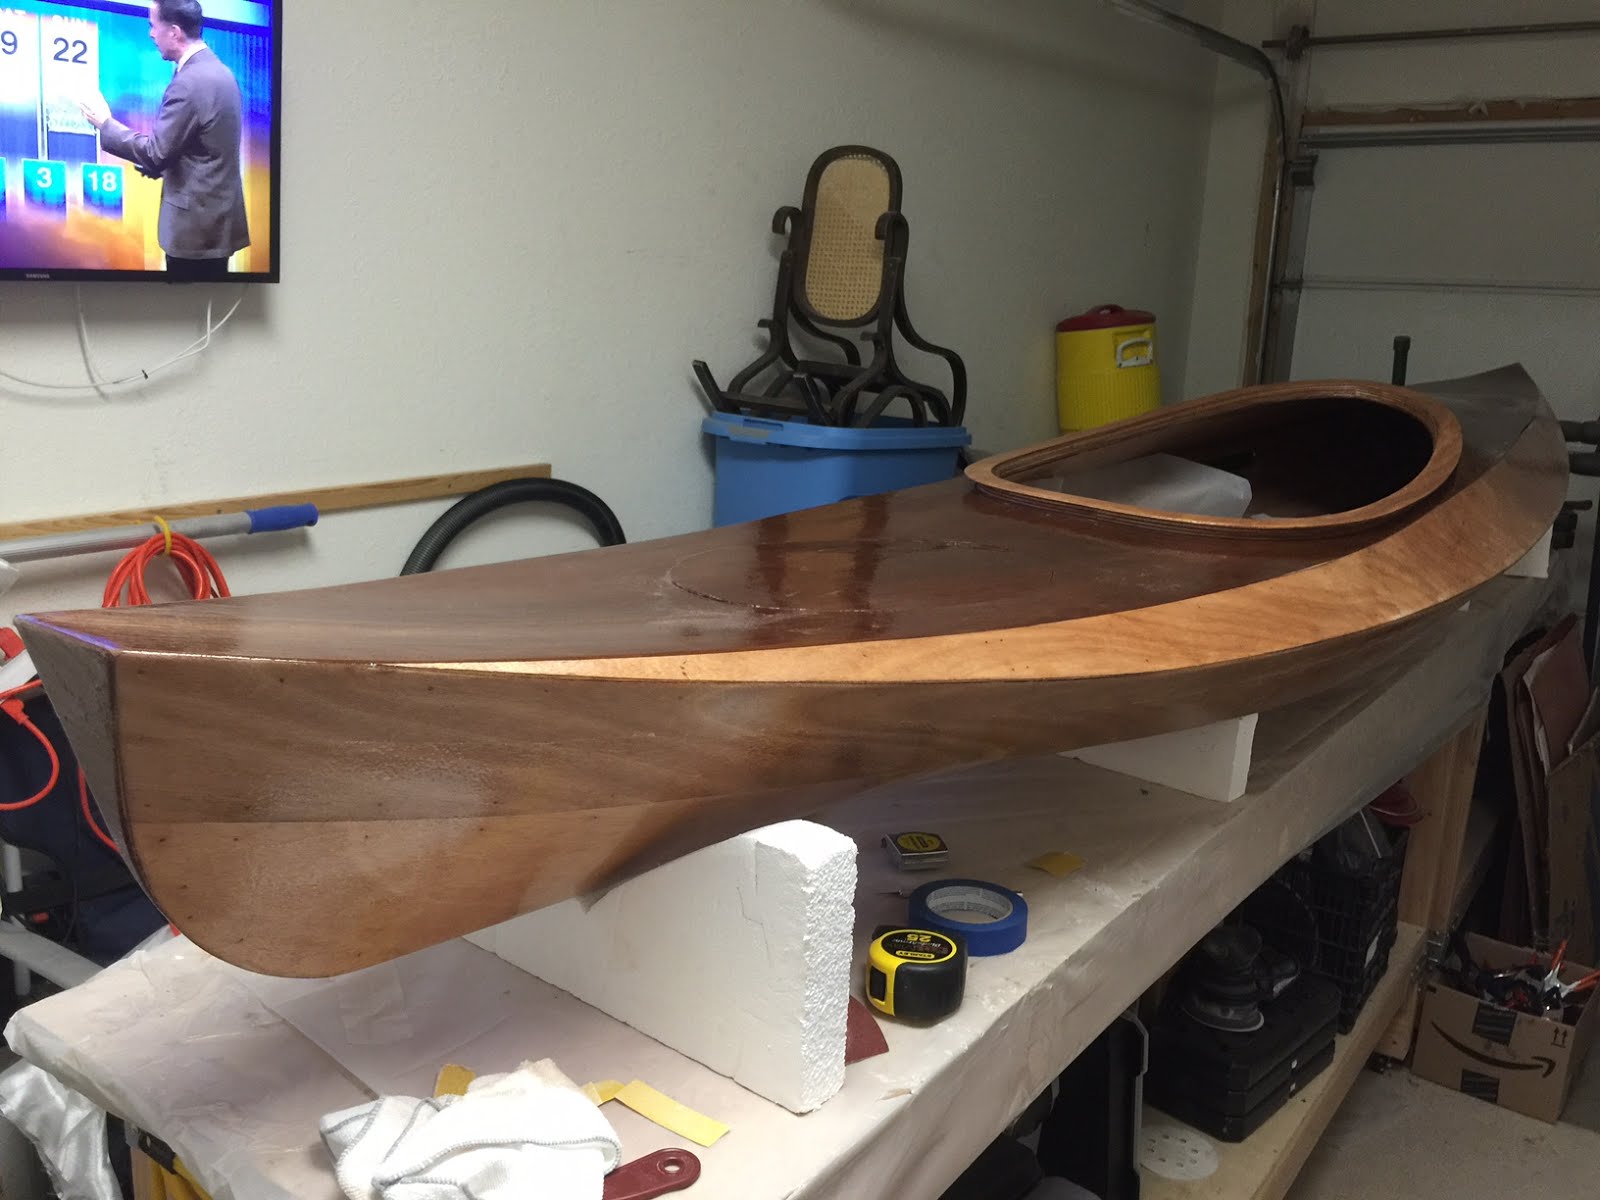
40. She's Done!

It took 40 posts to this blog but she is done! Well the sanding finally got done for real and the final coat of epoxy has been applied. The finish is super nice and I am very happy with it. Once the epoxy cures this baby is ready for water! Of course she will need varnish too. But that's just another step.

39. Final Sanding - Deck

Final sanding of the deck has been completed. This is one of those steps where you think you are done but then when you look again there is a little more. A few more spots... I have also attached the hooks to the underside of the hatch cover and the blocks inside the hatch to anchor the bungee cord.

Thursday, February 11, 2016

38. Construction Finished

Tonight the clamps came off the rim and it received its outer epoxy coat. This marks the completion of construction! All that is left is finish sanding and varnish. Started on December 17th working nights and weekends. With 2 full weeks off during that time! It doesn't seem real, maybe because I have a lot of sanding ahead. But nonetheless, I think by this coming Monday I will have it all done

Tuesday, February 9, 2016

37. Rim Attached

This step represents the near finish of the kayak. The cockpit rim has been glued on and clamped in place. I wish I had about 6 more clamps (not kidding). I will leave the clamps in place for at least 48 hours. As of tonight the entire kayak is down to only 2 pieces, the boat and the rear hatch cover. All of the pieces that make the kayak have been beveled, drilled, stitched, epoxied, filleted, taped, fiberglassed; sanded, rinse and repeat! There is a good deal of finish sanding to do before it receives its varnish. But then that does it! Don't worry there will be some more updates as I do the finish sanding and final varnish.

Saturday, February 6, 2016

36. Fiberglass Complete

Another major milestone. The fiberglass has been draped on the deck and smoothed. Next was application of epoxy. The challenge on this part was that a 2" section wraps over the edge and onto the underside of the hull. This makes sure the deck to hull joint is reinforced and that the overlapping fiberglass sections have plenty to grab. After it cures for 8 hours I will trim out the cockpit, hatch, and the 2" overlap along the hull. Just like the hull previously, the deck will get a couple more coats of epoxy to fill the weave of the fibers. Not a whole lot left to actually be done. Wow now that it's winding down I am sad. This has been a great project so far.

Friday, February 5, 2016

35. Deck Gets Epoxy

It's been a while since we have seen the kayak right side up. We let the hull cure fully before flipping over to work on the deck. Cleaned up edges of deck to hull seam and sanded here and there. Did some trimming of the back of the cockpit opening so that the curves would match the cockpit sill perfectly.  A bit unnerving to take a razor sharp Japanese saw to perfectly good boat!  Then the magic happened. Applied epoxy to the entire deck and tipped it out with a foam brush to remove bubbles. This was an amazing step to see become reality. Had no idea the Sapele Mahogany would be this beautiful.